Friday, November 05, 2010

Installing GWT Developer Plugin in Firefox 3.6 for Linux

If you are developing GWT web apps on a Linux system with Firefox 3.6+, then you might have been prompted to install the GWT Developer Plugin when trying to debug your app on Firefox (see image below).
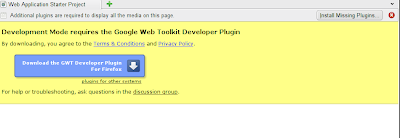

The problem happens when you try to install the plugin and restart Firefox - only to be prompted to re-install the GWT Developer Plugin again.

It seems like the latest Plugin on Firefox 3.6 requires the libnspr4.so.0d library and Mozilla Firefox 3.6+ only provides libnspr4.so. To solve this problem, simply locate the library and create a sym-link. For example, as root, execute the command:

sudo ln -s /usr/lib64/libnspr4.so /usr/lib64/libnspr4.so.0d

Then restart Firefox, install the GWT Developer Plugin, and then restart Firefox once more. You should now be able to debug your GWT web app!

Note that the location of the libnspr4.so library differs in each Linux distro. But here are a few common folders where it might be

/lib/
/lib64/
/usr/lib/
/usr/lib64/

If you are unable to locate the library in one of the directories above, you can try finding it by executing on the command:

locate libnspr4.so

UPDATE: The library should be provided in mozilla-nspr-32bit or mozilla-nspr.

Hope that helps some of you out! Leave me a comme
nt if you have any questions.


Wednesday, March 10, 2010

Setting Up SmartGWT 2.1 and GWT 2.0 with Eclipse 3.5

Requirements:
Setting Up Eclipse Environment:
  1. First, install Java and Eclipse like you normally would, setting up all the necessary environments (e.g. CLASSPATH, JAVA_HOME, etc).
  2. Install the GWT Eclipse plugin by going to Help > Install New Software...
  3. Press the Add... button and enter the following URL: http://dl.google.com/eclipse/plugin/3.5
  4. Check Google Plugin for Eclipse 3.5 and Google Web Toolkit SDK 2.0.3 and press the Finish button.
  5. Restart Eclipse after installing the GWT Eclipse plugin.
Create a GWT Web Application Project:
  1. Go to File > New > Web Application Project
  2. Enter the Project name: HelloSmartGWT
  3. Enter the Package: com.puguasoft.examples.smartgwt
  4. Be sure Use Goolge Web Toolkit is checked.
  5. Be sure Use Google App Engine is unchecked.
  6. Press the Finish button.
Setup SmartGWT:
  1. In your HelloSmartGWT project, create a new folder lib.
  2. Unzip smartgwt-2.1.zip and place both the smartgwt.jar and smartgwt-skins.jar in the lib folder you just created.
  3. Right-click on the HelloSmartGWT project and go to Properties > Java Build Path > Libraries tab and add both the smartgwt.jar and smartgwt-skins.jar to the build path.
  4. Open the com.puguasoft.examples.smartgwt.client.HelloSmartGWT.java class and replace the entire onModuleLoad() with the following:


public void onModuleLoad() {
IButton button = new IButton("Click Me");
button.addClickHandler(new ClickHandler() {
public void onClick(ClickEvent event) {
SC.say("Hello SmartGWT!");
}
});
button.draw();
}
  1. Open the com.puguasoft.examples.smartgwt.HelloSmartGWT.gwt.xml file and delete or comment-out the following:
        <inherits name='com.google.gwt.user.theme.standard.Standard'/>
  1. In the same XML file, add the following inherits elements:
        <inherits name='com.smartgwt.SmartGwt' />
<inherits name='com.smartclient.theme.silverwave.SilverWave' />
  1. Open the war/HelloSmartGWT.html file and add the following between the <head> section and before the hellosmartgwt.nocache.js script:
        <script> var isomorphicDir = "hellosmartgwt/sc/"; </script> 


Compile and Deploy:
  1. Right-click on the HelloSmartGWT project and select Google > GWT Compile.
  2. Press Compile in the dialog.
  3. Pay attention to the console to make sure there are no compile errors.
  4. Now deploy the app by right-clicking on the HelloSmartGWT project and select Debug As > Web Application
  5. After the embedded web server starts, point your browser to the the URL: http://127.0.0.1:8888/HelloSmartGWT.html?gwt.codesvr=127.0.0.1:9997
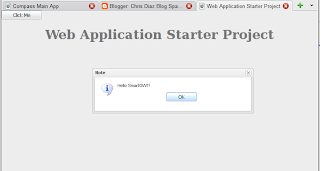
  6. You should see the following page: